

How to Wash Your Child’s Natural Hair
One thing I know about babies, toddlers and bigger kids for sure, is that they thrive with routines, steps and processes. So everything concerning caring about them must revolve around steps and processes, and that includes hair care. Washing your child’s natural coily hair can be an exhausting task on a normal day, not to mention when you do not have a system you implement each time it is your baby’s wash day. Ever since my baby was two months, I created a step by step process to washing her hair and this has worked for us for many months. I have also recommended this process to a lot of other mothers, and they have had huge success with it. So I am very confident that after reading this post, you and your little princess may have to set up a Hair Party and call the neighbors to join in the hair care fun, haha. So let’s get to it!
Before we begin, remember that this is a 5 Step process and you do not have to do it all at once, but you do have to do it on a day your calendar is free. The reason is that you would need to save some extra time for when your toddler or active baby gets really tired and just wants to be left alone. We all know how their mood swings can get out of hand and make you question everything, including your existence! You will also need to place everything you need on table and ensure your child has something to distract her for the period of time you are going to be washing her hair. What has worked for us ever since is a particular show on YouTube called Kid’s Camp, whose main character is called Elly. So once I say “Muna do you want to watch Elly”, her face lights up and she immediately reaches for my phone while I get on with her hair wash.
To complete this process, click here to download a checklist of things you will need to wash your baby’s hair.
Step 1: Detangle Your Child’s Hair Using Your Fingers
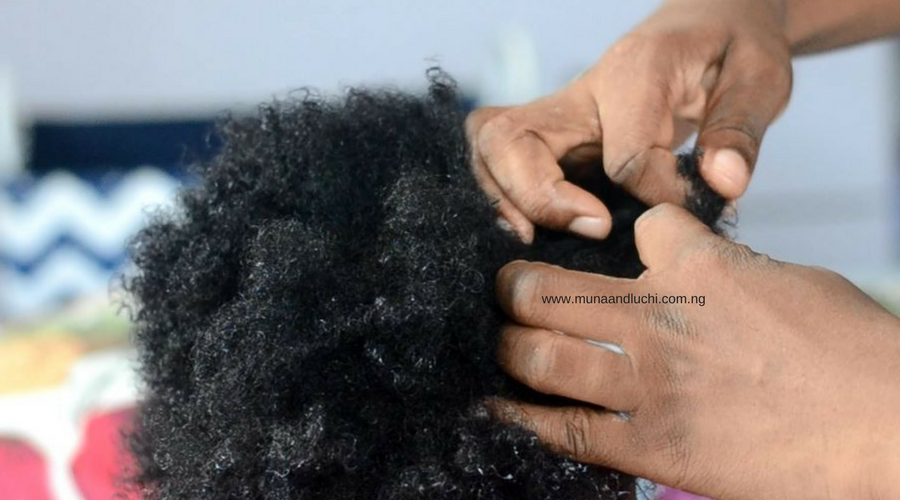
Always use you fingers to gently remove knots and tangles on your child’s hair
It is very important to always begin by using your fingers to remove every knots and tangle in your child’s coily hair before you wash his/her hair. This will make the washing process easier on both you and your little one.
To do this, part your child’ hair right down the middle of her head, this will give you to large sections. Then put one half away using a ponytail holder or a hair clip. I find that a ponytail holder works best for us. Then divide the free section into smaller workable sections, the number of sections will depend on how long and thick your child’s hair is. Thicker longer hair should be divided into more sections that thinner shorter hair.
Then take one small section at a time and apply the rinse out conditioner while running your fingers through the section, making sure you are gently untangling the knots and kinks in it. You can use the wide tooth comb when you must have removed almost all the tangles in each section and ensure you comb from ends (holding the roots) to roots.
After detangling each small section, twist it up to prevent it from tangling again and getting in the way of the sections you are going to be working on next. Once you are done with all the sections, let your child take a break, this will even allow the product penetrate into her hair strand more.
Step 2: Apply the Deep Conditioning Treatment
 Apply the Deep Treatment One Section by Section
This treatment involves applying a combination of oils and butters or a deep conditioning product (like a hair masque) and allowing it sit on your child’s hair for a few minutes.
To do this, all you have to do is take each section of hair and apply the product. Focusing more on the ends because it is the oldest part of the hair strand requiring more treatment than the part of the hair strand closer to the scalp.
Once you are done applying the product or your homemade mix, you can cover your child’s hair with a plastic shower cap or cling film and let the product sit for about 20 minutes. This could provide another recess time for both you and your baby, so take the chance to do one quick chore or better yet, find out what’s happening on Instagram, lol!
One quick tip for this step: There are two ways to do this; a) If your child is like mine, who cries at the top of her lungs and becomes restless once water touches her hair, you might want to do this stage before the actual shampoo step. b) However feel free to wash with a shampoo before applying a deep conditioner, if you are confident your child will be able to sit still for up to 20 minutes, through the entire deep conditioning process, then you can switch Step 3 for Step 2. My baby is 22 months old now and I still deep condition before washing with shampoo.
Step 3: Wash with a Sulphate Free Kid Friendly Cleanser
Apply your choice of sulphate free kid friendly cleanser, in sections of hair (if your child’s hair is really long, you have to take it one section at a time). I use the Shea Moisture for Kids Carrot and Mango Shampoo. It has really worked for Muna’s hair over the months, it keeps her scalp really clean. It is also moisturising as it allows my fingers run through her hair easily as I wash and a little goes a long way, so it lasts for like, FOREVER. Did I forget to mention, it smells divine, gosh! You can ladder up your child’s hair two times, then focus on the scalp and hair strands as well, rinse thoroughly with warm water. Quick tip; If you do a deep conditioning treatment before washing, then you will need to apply a rinse out conditioner after the shampoo washing, just to restore moisture to your child’s hair after the shampoo wash, and be sure to rinse the out the conditioner with cold water. This will open up the cuticles and allow moisture penetrate the hair strands.
Step 4: Blot out Excess Water using a T-Shirt or an Old Baby Leggings
To do this, you use an old t-shirt or one of your child’s old leggings to blot out excess water. Note that this step says, “blot out” not “dry” hair. The reason is that you do not want to remove all the moisture coming from the water on your child’s hair. I use leggings for baby because I can easily cover her hair with it for a while, just enough time for the excess water in her hair to be blotted out without vigorously shoving her hair all over the place with the cloth. Quick tip; do not use a regular towel for this stage as it has the potential to rip off your baby’s delicate hair strands and even leave your child’s hair feeling extremely dry after the wash.
Step 5: Seal in Moisture with Oils
The final step is to apply some oils to your child’s hair in order to seal in the moisture provided by the conditioning process. Ensure that as you apply the oils to the hair, you focus on the ends while you work your way down to the roots. For this you can use a combination of organically produced oils. I would recommend organic cold pressed coconut oil, avocado oil, sweet almond oil and olive oil, because they are easily absorbed in the hair strands since they are made up of smaller molecules.
So that is it, the entire process takes about half an hour, although it depends on how much time you leave for the breaks in between. Try not to worry if your child is usually restless during the process, ensure he/she is in a good mood before you begin. I usually keep my baby in her high chair, to make her stable and I do this when I want to be quick in the process.
Have you downloaded the checklist? If you haven’t, you can just click here to download it for FREE!